Member Account Management
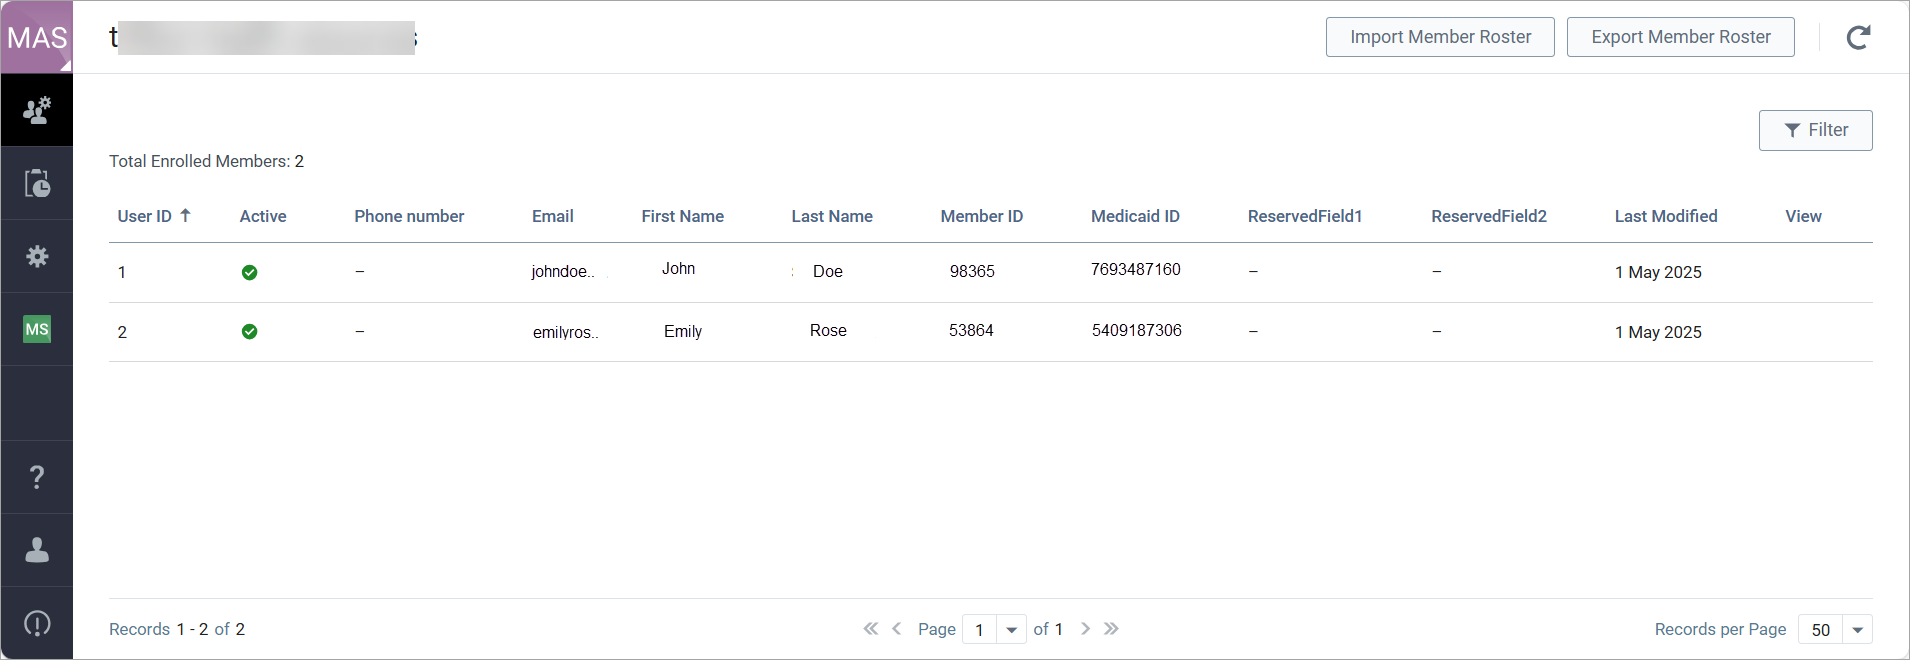
The Member Account page lets you manage all user accounts in your organization in one place. At the top of the page, you’ll see the count of Total Enrolled Members for a quick overview. Here, you can easily view your full roster, with member data displayed as imported from the .csv file. The page provides access to authentication information and lets you take actions on individual member accounts. You can add or update member details, export your roster, and permanently remove member records as needed. The Member Account page helps you keep account data current, control access, and maintain accurate registration records.
 Import Member Roster Import Member Roster
To allow your members to create their member accounts, you must import your members' data to the Member Account service:
- In the left navigation pane of Member Account, click the Member Account icon (
 ). ).
- Click Import Member Roster in the upper-right corner.
- In the Import Member Roster pane, click Get a CSV file header to download the sample .csv file with a pattern to compose a file with your members' data based on the roster schema configuration for your plan account, for example:
Copy
1
2
ID,IsActive,FirstName,LastName,MemberID,IsAuthRep
12,True,Court,Mathis,LA06120,23439853,False
- Create a .zip archive of your .csv file.
- Drop the archive to the Import Member Roster pane and click Run.
- In the left navigation pane of Member Account, click the Jobs icon (
 ). ).
- Find the corresponding import job to view the job status.
- After the file passes the validation (the job's status is Success), refresh the roster by clicking
 in the upper-right corner to view the newly created members. If one or more member records contain errors (the job status is Error), click Download report to view the errors that you must correct, and then repeat the import procedure. in the upper-right corner to view the newly created members. If one or more member records contain errors (the job status is Error), click Download report to view the errors that you must correct, and then repeat the import procedure.
View Members
After adding members to your account, access the Member Account () page to see the list of members with their imported data. To find a particular member in the list, use filters  in the upper-right corner. in the upper-right corner.
Once a member registers with the Member Account, you can view the email addresses and/or phone numbers they use for authentication in their profiles.
Edit Member Data
- Open your .csv file containing member data.
- Make changes as needed to add new members or update existing member details.
- In the left navigation pane of Member Account, click the Member Account icon ().
- Repeat the import procedure by uploading the updated .csv file.
Reset Credentials for a Member Account
- In the left navigation pane of Member Account, click the Member Account icon ().
- Find and select the member whose credentials you want to reset.
- Click the details
 icon to open the account details pane. icon to open the account details pane.
- Click Reset Credentials, and copy the newly generated password from the Reset Credentials pane.
Export Member Roster
- In the left navigation pane of Member Account, click the Member Account icon ().
- Click Export Member Roster in the upper-right corner.
- Select options to include members’ email addresses and/or phone numbers as needed, then click Run.
- In the left navigation pane of Member Account, click the Jobs icon ().
- Locate the relevant export job. When the job status shows Success, click Download roster.
- Choose a file location and save the .zip archive containing member data, and then click Save.
Disable Member Account
- In the left navigation pane of Member Account, click the Member Account icon ().
- Find and select the member account you want to disable in the roster list.
- Click the disable
 icon next to the member’s details. icon next to the member’s details.
Delete Member Data
You can permanently remove all the imported member records from your account.
Note: If you have members who completed their registration, after you remove all member records and repeat the import, those members will have to register again.
To remove all members’ data from the Member Account:
- In the left navigation pane of Member Account, click the Account Configuration icon (
 ). ).
- On the Advanced tab, click Drop All Data.
- Enter your email address and click Confirm Deletion.
|
|